Internal Audits: Another Component of Our Quality Control Program
December 23, 2020

As regular readers know, along with safety and on-time delivery, nothing is more important to us here at Laser Precision than quality. In a previous blog, “Mastering the Science of Quality,” we defined it as: “Meeting any and all customer expectations and requirements.” (ISO defines it as “assess process conformity, evaluate performance, and identify processes that require improvement.”) In the article, we outlined how we document and measure quality, as well as proactive steps we take to maintain it.
In this post, we will review internal audits, another tool we use to ensure the parts we ship meet our high standards.
A Team of Internal Experts
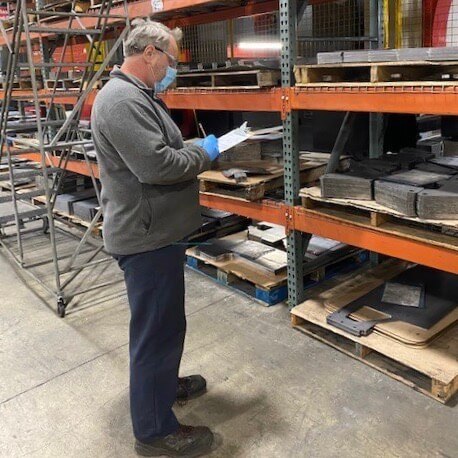
Maintaining a ISO9001 certificate requires you to have an internal Quality Control Auditing Team in place. The audit must be done with an impartial and objective eye. The intent of ISO audit is to provide a mechanism to help the facility acknowledge what the customer needs and try and exceed that. This fits in nicely with our own goals. Our audit work was done by Quality Manager Matt Keller and his Quality Control Team.
In 2015, ISO changed the wording of this rule to allow fabrication personnel to audit their own work. With this ruling, key managers and supervisors on the shop floor became “deputized” members of the audit team. “Not only does this put more pairs of eyes on our work, but it involves those most familiar with the best practices of each department,” Keller said. “This increases the chances that a small glitch can be remedied before it grows into a major problem.” Normally, supervisors will step in to correct problems within 24 hours of a red tag (part fail) notification.
Proactive and Reactive Measures
Basically, an audit begins with a review of the protocols and procedures for each process involved in making the part. This is to confirm that all best practices are being followed. It’s also important to review the procedures to see if something has changed in the process and new measures need to be implemented.
Keller and his Quality Control Team are constantly watching data generated by the shop to monitor our level of quality. Data from ERP, scrap rates and efficiency ratings are examples. Fluctuations will trigger an audit. This is how they identify areas of high exposure to risk.
But anomalies can also occur which aren’t reflected in the data and a bad part can slip through. “We usually find out about these through an external complaint or when a work station “red-tags” a part from a position upstream as not meeting quality standards,” Keller said. “That also initiates an audit.”
The problem could be the operator doesn’t understand the procedure, it’s been too long since they were trained or they are just not observing the rules. In this case, the operator may need to be re-trained. Regardless of their performance, all operators are re-trained annually to make sure they are up to speed on the latest best practices pertaining to their stations and duties (forklift driving, welding training, defect identification, gauge maintenance, etc.). To help ensure understanding, classes are held in English and Spanish.
“The audit may also reveal circumstances we can’t control, so we have to find a way to mange the risk,” Keller said. “For instance, humidity is always a problem, so procedures are in place to prioritize lead times for parts that are prone to rust, or we come up with measures to preserve the parts.”
Another example was the splatter and undercuts that commonly occur with manual welding. These concerns can easily create red tags that slow up the process to a complete part. With an audit in place, these issues came to light faster, allowing us to address them in a timely manner. Putting a robotic welding cell in place remedied the situation with weld quality, not to mention faster processing time for parts that require a lot of welding.
Keeping Quality Levels High
The results of audits are presented to the management team at a monthly meeting. A reason for the error is found and the problem is corrected 92% of the time. To put this into perspective, only 90 parts out of every one million shipped do not meet our quality standards. It may be possible to bring this number down to zero, but the cost in time and effort would be prohibitive. That number is even more amazing when you realize our business is growing, which increases the opportunities for errors to occur. Thanks to Matt Keller, his Quality Control Team and all the shop floor “deputies” for their constant vigilance in keeping our level of success so high.


